Shiva as Nataraja

Shiva as Nataraja

SHIVA AS NATARAJA
Researched by Rochelle Almeida

1987.80.1
Artist Unknown
Bronze Sculpture
Provenance:  Tamil Nadu, India
Late 11th Century, Chola Period

Who is depicted in this sculpture?
This sculpture depicts Shiva, one of the Gods of the Hindu Trinity usually represented as Brahma (The Creator), Vishnu (The Preserver) and Shiva (The Destroyer).

Materials and Method:
In the 10th century, there was a revolution in India with regard to the creation and depiction of sacred images.  In Hinduism, there is a great need, on the part of the faithful, to actually “see” the God—to receive his “Darshan”. Thus, the deities were given royal stature. In the 10th century, the Cholas, a dynasty of powerful Southern kings in India, began to make large metal images. Between the 5th and the 10th centuries, the images of gods and deities were very small, almost tiny. But the Cholas changed that. They mounted these metal images of their gods on poles and carried them around the villages in processions or parades. The fact that this Shiva image has holes in the bottom testifies to this practice. The Cholas chose to make metal sculpture instead of coins, which were popular signs of power and greatness up to this time.
The Cholas used the Lost Wax (Cire Perdue) method for casting their sculpture. They created images with all the details in beeswax and resin.  The wax image was then covered with three layers of finely-ground clay and was placed in a primitive kiln which was basically a hole in the ground and was fired. When the wax melted and ran out of the holes, it would leave behind the clay mold into which the molten metal was then poured.  When the mold cooled down, the artisans broke it and were left with the metal sculpture. Thus, every Chola sculpture is unique.  No two pieces are alike since the mold could never be reused.  This method is very difficult to manipulate as each sculpture weighs at least 50 to 60 pounds.
When the image was ready, it was put through an eye-opening ceremony in which the real deity was said to take residence inside the image.  Thus, the deity’s spirit would enter the image and make it worthy of worship by the faithful.
Symbolism in the Sculpture:
Every aspect of this sculpture is loaded with symbolic meaning.  Various art historians have interpreted the features of the sculpture in differing ways. Indeed, there are as many theories with regard to this sculpture as there are deities in Hinduism.
In this sculpture, Shiva has been depicted as Nataraja, or Lord of the Dance.  He is presented in the gesture of a victorious cosmic dancer, dancing the dance of life, the dance of ecstasy or the dance of bliss (ananda tandava). Though he is victorious, Shiva’s face shows serenity and passivity that could only come with Godliness.  This symbolizes that he is able to take failure and triumph with the same serenity and balance.  The fact that he is dancing on one foot further corroborates this concept of balance and proportion.
The origin of the Shiva dances have been lost in antiquity, but they seem to be of Dravidian origin, i.e. hailing from South India. This dance is performed in one spot—the center of the universe.

Though Shiva is traditionally viewed as the Destroyer, in this sculpture he fulfils the roles of all three gods of the Trinity—he is the Creator, the Preserver and the Destroyer. He dances the universe into being, sustains it with his rhythm and then dances it out of existence.
The Legend behind the Symbolism of each object in the sculpture:
The legend goes that Lord Shiva came upon a group of sages who were practicing unorthodox Hinduism.  Shiva wishes to convert them to orthodox Hinduism but the sages were reluctant to be converted.  So, they began to throw all kinds of dangerous objects at the God, including fire, the demon of ignorance (Maya) over whom Shiva is seen dancing, snakes, tigers which symbolized egoism and is suggested by the tiger’s skin skirt that he traditionally wears. Shiva caught the fire in his hand which then became part of the aureole around him. He then began his Victory Dance, because he had proven worthy of the challenges that the sages threw at him and had triumphed.
Shiva’s Hands:
The figure has four arms.  The upper two arms are extended to the sides.  His right hand holds a small pebble drum shaped like an hour-glass (still used by street entertainers in India), the left hand holds a leaping, five-pronged flame called agni or fire. These two objects symbolize the fact that Creation emanates from the reverberations of the drum even as the destruction of the universe arises from the searing heat of the flames.
The lower right hand makes the gesture of Abhaya Mudra. Mudra means gesture or expression.  Abhaya means the Removal or Dispelling of Fear.  Thus, part of Shiva is depicted as protecting and preserving.  The other arm points to his raised foot—the refuge of the three worlds.
The Demon:
Shiva is seen dancing with one foot planted firmly upon the sprawling figure of a dwarf. This dwarf is variously represented as being Ignorance (or Maya). Some Hindu theologians refer to this figure as representing Maya or Illusion. This same malignant dwarf, sometimes called Muyalako, is said to lead mankind astray. His left leg is raised and pulled across his body so that it almost touches the encircling halo.
Shiva’s Hair and Head:
The five locks of hair on each side of his head are strung together by flowers and look like waves over his shoulder.  His hair is braided with the lower locks whirling as he dances in the stance of a yogi. The ever-expanding universe takes form in the great halo or circle of flame called a mandala, whose periphery is marked by flames resembling the one in Shiva’s hand.
Shiva’s Jewelry and Decoration :
Shiva combines in this depiction both the male and the female genders. He wears a man’s ear-ring in his right ear and a makara or large circle in the other ear—signifying that he is all mankind. Like a woman, he is adorned with jewelry—bracelets, necklaces, armlets and anklets. Yet, like a Hindu man, he wears the sacred thread around his torso.  The sacred thread is important in Hinduism as it signifies a step in initiation rites—symbolizing the passage from childhood into manhood when puberty begins. This practice probably came to India over 3,500 years ago through the Aryans, earliest settlers on the Indian sub-continent. Most of the decoration is executed in very low relief which sets off the smooth surfaces of the body.

Conclusion:
This primordial dance represents the very cosmic nature of the universe, its rhythm, its balance. It contains within it references to the rising of the setting of the sun and the moon, the ebb and flow of the sea and the tides, the swell of the ocean, the coming and going of the monsoon every year and the rhythmic moves of the cosmos. Shiva destroys the old so that the new might take its place. It is the quintessential delineation of the essence of Hinduism.
By witnessing this image and assimilating its meaning, the Hindu devotee receives reassurance and understanding and frees himself from the fetters of the earthy life.  Thus, he avoids Samsara (reincarnation) and attains moksha (salvation).

BIBLIOGRAPHY:

Anonymous:  “Introduction to Indian Sculpture”. In The Image of Man. Hayward Gallery. London 1982, 225.

Chandra, Pramod:  The Sculpture of India 3000BC-1300 AD. National Gallery of Art, Washington, 1985, 192-194.

Coomaraswamy, Ananda K: The Dance of Shiva. Dover Publications, New York, 1985, 58.

Iyer, Bharatha Iyer:  Indian Art. Asia Publishing House, Bombay 1958, 243.

Lerner, Martin:  “Lord of the Dance”. MMA Bulletin, New 51, Spring 1994, 44.

Portrait of Gertrude Stein

Portrait of Gertrude Stein by Pablo Picasso

(Photo:  Chris Harris)

PORTRAIT OF GERTRUDE STEIN
Researched by Rochelle Almeida

47.106
Pablo Picasso (Spanish, 1881-1973)
Oil on canvas
Size: H-39-3/8, W 32 in.
Bequest of Gertrude Stein, 1946.

Who was Pablo Picasso?
Pablo Picasso (1881-1973) was born in Malaga, Spain, grew up in Barcelona and died in Mougins, France, where he had spent a great part of his productive and creative life since 1904. He is considered the central figure in 20th century European art and with the artist Georges Braque is credited with having initiated such revolutionary aesthetic movements as Cubism. Picasso’s personal life was characterized by a number of relationships with women, many of whom were his models and became subjects of his work and by a vastly varying series of stages or “phases” during which times his work underwent dramatic changes. Besides being a prolific painter and draftsman, Picasso was also an accomplished sculptor and printmaker and produced ceramics and theatrical designs.

Who was Gertrude Stein?
Gertrude Stein was an expatriate American living in Paris, a central figure in the French avant garde and one of the first to respond with enthusiasm to the artistic revolution in Europe during the early years of the 20th century. She nurtured and inculcated an avant garde in the visual arts that is as great as her literary contribution. She was a woman of means and her weekly salons held at her Paris apartment became a magnet for European and American artists and writers alike and her support of Matisse, Braque, Gris and Picasso was evident in her many acquisitions of their work. For Picasso, this early patronage and friendship was of major importance.
How did this portrait come to be painted?
Neither Stein nor Picasso could remember exactly how this portrait came to be painted, but it was a landmark in Picasso’s career. It was begun in 1905 at the end of his Harlequin period and before he took up Cubism. The story goes that they lived at opposite ends of Paris and Stein had to trek right across town to Picasso’s tiny studio to pose for him. According to legend, she made at least 90 trips to his studio, day in and day out. According to her book, The Autobiography of Alice B. Toklas (1932), Picasso had never had anybody pose for him since he was sixteen years old! He was then 24 and Stein had never thought about getting her portrait painted. Anyway, it did happen and she posed for him willingly.
The Story Associated with this Work:
Picasso seated Stein in an old broken armchair and began work from the bottom of the canvas, gradually moving upwards. After at least 90 sittings, all of a sudden, he painted out her whole head, saying irritably, “I can’t see you anymore”. And so the canvas was left like that.
That summer (1906), Picasso traveled to Spain where he had the opportunity to see an exhibition of Iberian sculpture followed by another one of African Art at the Louvre, back in Paris. These proved to be a powerful inspiration. He was struck by the dynamics of those images and their mask-like faces. He returned to Paris and with no further sittings on Stein’s part, completed the painting.
Visual Details:

close examination of the painting reveals that it has a very limited color palette characterized mainly by dark browns and gray. The lack of detail results in making a powerful, stolid figure of Stein, who is shown to lean forward slightly in the armchair, as if ready to spring. The curves of her skirt seem to blend into the fabric of the upholstery. It is a powerful figure, indicative of her position in Parisian artistic circles. The composition is pyramidal with her head forming the apex at the top. Stein was an imposing woman and a staunch lesbian. The monochromatic palette only enhances her power. Following this work, Picasso became even more reductive, veering towards Cubism. After this, he painted Les Demoiselles D’Avignon (which is currently in the Museum of Modern Art).
However, when you look at the lead, you see a clear line of demarcation between the planes of her face and her hairline. Suddenly, her features are less naturalistic and appear mask-like.  The hairline is very defined. There are no wrinkles on her face. Every feature is very clearly delineated. It is a two dimensional canvas surface, which looks like a hard, brittle form as opposed to her hands, which are softer.
Significance of this Painting:
It becomes clearly evident that with his trip to Spain, Picasso moved away completely from depicting reality towards depicting his conception of reality, i.e. he shifted from perception of an object or subject to conceptualization of it. He would, from then onwards, not present something as he saw it actually placed before it, but as altered by his thinking of it. Thus, his art from this point on, becomes deeply cerebral. This painting represents Picasso’s break from Realistic and Naturalistic art towards Abstract or Modern Art. From this point on in his career, it would not be empirical reality that would inform his work, but his personal vision. Picasso had succeeded in originating a movement that would take the art world by storm, so that Modern Art would never be the same again.

How did Stein react to the completed canvas?
Stein loved the work immediately and kept it in her home so that it hung above her fireplace until her death. It was very meaningful to her and upon her demise; she bequeathed it to the Met.
The story goes that when fellow artists saw it, they exclaimed with disappointed that it did not even look like her and Picasso who thought his paintings had premonitory powers, is said to have assured them that, “It will”. Apparently, he must have been gratified for his words came to pass.  It is said that as she aged, Stein increasingly came to resemble the painting.
BIBLIOGRAPHY:

Brassai (Henry Miller) and Jane Marie Todd. Conversations with Picasso. University of Chicago Press, Chicago, 1999.

O’Brien, Patrick. Picasso:  A Biography. W.W. Norton, New York, 1994.

Paul, Stella. Gallery Talk on “Twentieth Century Paintings at the Metropolitan Museum” given to New Highlights Tour Inductees on April 2, 2001.

Rodenbeck, Judith. Insistent Presence of Picasso’s Portrait of Gertrude Stein. Columbia University, New York. Unpublished  Abstract, Fall 1993.

Stein, Gertrude. Picasso. Dover Books. New York, 1984.

The Greek Kouros

(Photo: Chris Harris)

SCULPTURE OF A KOUROS (YOUTH)
Researched by Rochelle Almeida

32.11.1
Artist Unknown
Naxian Marble sculpture
Height (without plinth): 76”
Greek, Attica
580 B.C. Archaic

What does this sculpture represent?
This is a statue of a “kouros”, Greek for “youth” (plural: “kourai”). It is a funerary statue, which means that it would have adorned the grave site of the deceased, in this case, quite presumably a noble and healthy human being who, unfortunately, died young. Neither the identity of the subject represented in this statue nor the identity of the carver is known to us. It was customary for the Greeks to commemorate their dead with statues of this kind and several funerary pieces survive. However, it is rare to find one that depicts the entire physique of a young man.
How old is this sculpture?
This statue was made around 580 B.C. during the Greek Archaic period—this makes it one of the oldest pieces to be found in the Metropolitan Museum.  This is indeed one of the earliest freestanding marble statues of a human figure carved in the Attica region of ancient Greece.
Methods and Materials:
The Kouros is carved out of a single slab of marble. What makes it remarkable is that it is free standing, which means that it has no support system to bear its weight. This is a difficult feat to achieve since the base provides the only surface upon which the entire figure balances. It is extremely difficult to carve a large figure with all the weight carrying down through the two legs with no added support along the sides. This represents a huge step in success for the sculptor has achieved his goal of liberating the figure from its original block of stone. In doing so, he achieved a more natural, well-balanced appearance, endowing the Kouros with an extraordinarily life-like vitality. This figure is slender and elegant with the alert, elastic physique of a sprinter. The availability of iron for knives and chisels and the use of drills and wedges enabled Greek sculptors to make rapid progress in their carving techniques.
After being carved, the kouros would have been painted in bright, vivid colors, some remnants of which are still faintly visible. Age and time have taken their toll on this statue and the paint has naturally worn away.
Visual Details:
The Kouros stands in a frontal pose, its arms held alongside the body, joined to it below the armpits and ending in clenched fists. The entire face has clear-cut features that pronounce an almost aristocratic bearing. There is a sense of nobility conveyed by the muscular torso, the long neck, powerful arms and legs and the merest hint of a smile.
The Kouros has an interesting hairstyle. The curly long hair hangs down behind in fourteen lovely beaded tresses. An encircling fillet is tied behind in a reef knot and has long ends that hang loosely down.
As one’s eyes move further down the statue, one is struck by the anatomical detail of the piece. Each nerve, muscle and sinew seems to be lovingly detailed by the carver’s chisels. Muscles bulge above the kneecap. A look at the calves at the back suggests the merest hint of a vein. This is a highly naturalistic carving, through which the sculptor has attempted to convey the vigor and poise of a handsome and healthy man, brimming with the joie de vivre of life. It is such a pity when one considers his youth that he enjoyed such a short life. Perhaps it is a testimony to the old adage that “Those whom the Gods love, die young”.
Significance of this sculpture:
The Kouros is interesting because it points very clearly to the influence of the Egyptians upon the Greeks. If you get a chance to see the Temple of Dendur in our Egyptian Wing, you will notice the manner in which the Egyptians depicted the human figure. Men are always depicted with their left legs stepping forward and this is exactly the pose of this Kouros. According to Herodotus, the Greeks were introduced to Egyptian civilization after the pharaoh Psammetichos hired Ionians as mercenaries in the middle of the 6th century B.C. Accordingly, the Greeks learned how to quarry stone and plan the execution of large scale statues from the Egyptians who had been working with stone for centuries. Besides, the Kouros recalls Egyptian design in the pose, in the broad, square shoulders and in the rigidly frontal and symmetrical designs.
Nudity in Greek Art also has special importance.  The Greeks, unlike the Egyptians, had no reservations about representing male human figures in the nude. No other contemporary culture had this custom. The Kouros, unlike Egyptian figures that are seen to be wearing kilts, is depicted in the nude, as the Greeks believed that physical beauty reflected inner nobility. They also considered that nudity had a connotation of heroic excellence. Indeed, they participated in some heroic contests, including some events in the ancient Olympics, in the nude—the better, they believed, to showcase the perfection and naturalness of the athletic human figure. Nudity also separated male from female; Greek from foreigners.
For a long time, this Kouros was said to represent Apollo. Indeed it was called the archaic Apollo. To the Greeks, Apollo, a protector of young men, was himself in appearance, simply a glorified young man.
Conclusion:
The unknown sculptor of this work has done a remarkable service to his unknown subject—he has depicted him in all his human perfection, but the fact that it stood upon a grave, reminds us inevitably of the finality of death.
BIBLIOGRAPHY:

Boardman, John. Greek Sculpture:  The Archiac Period. New York:  Thames & Hudson, 1978.

The Metropolitan Museum of Art Guide. Second Edition. New York:  MMA, 1994.

Richter, Gisela M.  A Catalogue of Greek Sculptures. Cambridge, Massachusetts:  Harvard University Press, 1954.

———————- Kouroi:  Archaic Greek Youths:  A Study of the Development of the Kouros Type in Greek Sculpture. New York: Hacker Art Books, 1988.

Gibbons in Landscape

Gibbons in a Landscape

GIBBONS IN A LANDSCAPE

Researched by Rochelle Almeida
Attributed to Sesson Shukei


Ca. 1504-1589.
Muromachi Period (1392-1573)
Ca. 1570.
Pair of six-fold screens
Ink on Paper
(992.8.1.2)

Plaque:

The Gibbon, native to the forested mountains of southern China, is known in Japan only in poetry and painting.  The Gibbon has been celebrated in China as a noble creature dwelling in remote places accessible only to the wandering recluse or poet.  Its cry is associated in poetry with the elevated spirit of solitude and in Daoist lore with an expression of the superior “life-spirit” (qi) attributed to this venerated animal.

Paintings of gibbons by the Chinese monk-painter Muqi (ca. 1245) were treasured by the Japanese Zen monks and paintings of gibbons in the manner of Muqi became a favorite subject for screen decoration by the late fifteenth century.

Here, the image of a chain of gibbons is reaching for the moon, symbol of enlightenment, while seeking futilely to grasp its reflection in the water.  It illuminates a fundamental Zen paradox.  Perhaps the gibbon who sits alone as if in meditation, symbolizes a more promising quest, for he is seeking enlightenment from within.

Sesson was a Zen monk-painter active in Eastern Japan from the 1540s until about 1589.  The character of his mature style is revealed in the sure, animated brushwork of the landscape.  Also constant in his work is the kinetic composition unified by a surging stream that sweeps across the foreground to splash against a rock in the great fingers of foam.

My observations:

There are 10 gibbons in all.  Some are depicted in pairs, some are alone in solitary meditation.
One is seen reaching for the moon as it is reflected in the water.
The landscape is lyrical and serene, depicting rocks, mountains, foliage, trees, bamboo fronds, the ripples in the water, the reflection of the moon.

The gibbons are in various stages of play. It is hard to imagine that this ethereal scene of deep and quiet serenity has been achieved by the use of ink alone.  The artist has managed to get so many shades of the same color—black—from the softest gray to the darkest black.  He has also managed to convey textures through this painting.  The gibbons actually look like cuddly furry creatures through the use of ink alone.  There is lots of texture and tonal quality in this work. The mountainous terrain skillfully conveys the spiritual ambience of this retreat.

This painting is enclosed within a mahogany frame with rich brocade fabric tr

The Frank Lloyd Wright Room

The Frank Lloyd Wright Room

THE FRANK LLOYD WRIGHT LIVING ROOM
Researched by Rochelle J. Almeida

1972.60.1
Designer: Frank Lloyd Wright (American, 1867-1959)
Living Room from Francis W. Little House
Wayzata, Minnesota; 1912-1915
White oak, electro-glazed glass, leaded glass windows
For furniture and textiles (See 1972.60.2-23).

Introduction:

The room, usually referred to as the Frank Lloyd Wright Living Room on the first floor of the American Wing in the Metropolitan Museum of Art in New York City was designed by the architect and interior designer who often called himself, according to his biographer, Harvey Einbinder, “the master” (6). Indeed, Einbinder continues:  (Frank Lloyd Wright) “beamed when he was described as ‘The Greatest Architect in the World’ and boasted ‘when (Louis) Sullivan and I came to architecture it had been sleeping a hundred years.  We woke it up’” (6).
Where was this room built and why?
Another one of Wright’s biographers, Kenneth Starosciak, informs us that the room was designed by Wright to become the vastly proportioned living room of the Francis W. Little House and was completed between 1913 and 1915 (1) expressly for the purpose of providing an elegant musical hall for the piano recitals that Mrs. Little, a trained classical pianist, often gave. At the time, Wright had just completed the design of  what would become his own new home at Taleisin, that tragically, had been set on fire and destroyed “by a demented servant” (n.p.), according to Morrison H. Heckscher.  “To pay for the reconstruction of Taleisin, Wright actively sought architectural commissions” (Einbinder  54).  The Little house was one such, meant to overlook Lake Minnetonka and serve as the summer residence for the wealthy couple (Starosciak 1).
Proportions of the Room:
The house, in Wayzata, Minnesota, “featured a giant 55 foot living-room whose 14 and a half foot ceiling seemed to float in mid-air, suspended by sunlight streaming through five old-trimmed skylights” (Einbinder 155). The living room was “acquired” by the Metropolitan Museum in 1970, when plans were afoot to destroy the house, and was meant to serve as an indication of the master’s expertise in “organic architecture”—in which the building, the setting, the interior and the furnishings are inextricably related”, according to the plaque found in the room.
Visual Details:
Based upon the fact that the room overlooks Central Park on its Western side, one is struck immediately by its mood of calm serenity.  Indeed, one’s eyes are drawn from the lush green carpet of natural grass in the park to the moss-green carpet that covers a considerable part of the room’s oak floors.  The fact that window seats run in an unbroken line along the room’s western side, i.e. alongside the park, offers the viewer unhampered views of the landscape outside and endows the room with the feel of what one would, in contemporary terms, call a “sunroom’.  The window seats encourage the visitor to linger awhile, leave the cares of the world behind and drink in the natural light and beauty as one  partakes of the tranquility of Nature outdoors.

Importance of Light:
 Light floods the room, then, and becomes integral to its mood and design.  So intrinsically is light related to the overall conception of this space that skylights are fitted into the ceiling which contribute to the ambience of the natural setting and tie in the theme of bringing the outdoors in.  Fitted into what the modern architect would call a “tray ceiling’, are a number of panels of glass, embellished with wrought-iron fretwork in the typical linear forms of Wright’s most noted work.  This fretwork provides the grill-like structure through which light filters softly and bathes the room with golden rays, no matter what the time of day. At night, the room is softly lit by the original electrical lighting that lies concealed behind the panels. Combined with the wrought-iron fretwork that forms the ceiling are the windowpanes themselves—stained glass set in electroplated copper frames and embellished by the slightest touches of leaf-like design.

Style:
Indeed, it would be impossible to describe the style of this room without making reference to two phrases, then fashionable in the world of architectural design—one was Prairie  Style, the other is The Arts and Crafts Movement. According to.Heckscher, the characteristic features of Prairie Style evolved through Wright’s construction of his own home in Oak Park, Illinois, and was exemplified in “generally, a low horizontal mass, hugging the ground; specifically wide overhanging roofs, grouped windows with leaded glass designs, and natural wood and brick for interior trim” (n.p.).  Certainly, the Little house has all these features.  The Arts and Crafts Movement, on the other hand,  promoted, according to Edward Lucie-Smith’s definition of the term, “craftsmanship and a reform of industrial design” and was “named after the Arts and Crafts Exhibition Society founded in England in 1882” (21). This movement attempted “to reform the decorative arts, emphasizing the potential for good social and moral influence and encouraging a return to the ‘fitness for use’ of Gothic architecture” (Lucie-Smith 21-22).  The Movement spread from England to the US, and Wright came strongly under the influence of this school of design philosophy and reflected its principles in his interiors that have been referred to as ‘Minimalist’.  Minimalism is evident in the sparseness of the furniture and the severe lines of their design. The all-wood conception, integrated with the straight, unfussy lines of the Arts and Crafts Movement results in a stark feeling of peaceful serenity.

Furniture Layout:
Placement-wise, the room, according to Kathleen Howard, follows the principles of an “open plan” (43). Thus, the center of the room remains bereft of furniture, allowing easy movement and contributing to the air of spatial continuity as the eye moves from the fireplace end to the opposite side of the room, dominated by the library table, so-called because its design provides for the storage of books underneath while its surface allows for them to be spread out and browsed through.
The reddish-brown, all-brick, floor to ceiling fireplace (a repetition of the exterior brickwork) dominates one wall at the far end and is prevented from being overpowering by the room’s vast proportions.  While devoid of a mantelpiece, a single, simple, low stone slab runs across it and remains free of any accessories. As if to take advantage of the fireplace’s warmth and glow, two couches are placed diametrically opposite to the hearth.  One is particularly struck by the lack of a coffee table, but then on further observation, it becomes clear that the longer couch serves this function, being provided with extended arms on both sides to hold glasses, magazines or ashtrays.  Needless to say, all of the furniture groupings were designed by Wright himself to enliven peripheral spaces and contribute to quiet work activity.
There is no clutter to distract the mind or the eye in the quiet lines and the natural elements that comprise the room’s accessories. Indeed, accessories are also minimalist in conception and design and represent the natural environment—ceramic bowls and vases, of Japanese origin, dating from the 17th to the 19th centuries on the console tables flanking the room’s sides;  on the library table, a few books, a wooden bowl of dried flowers, and a beautiful reproduction of a plaster cast of the Winged Victory of Samotrace (Greek, 190 BC) , considered one of the oldest masterpieces of world art and currently to be found in the Louvre in Paris; a drafting/drawing table facing the windows and taking advantage of natural light; a couple of cushioned chairs (certainly comfort was not sacrificed to the principles of good design!); two tall, narrow vases (referred to as ‘Weed Holders’), “cogent examples of Wright’s mastery of architectural scale in small objects” (plaque), also referred to as ‘skyscrapers’; a statue of the standing Buddha, further contributing to the air of quiet serenity and Eastern meditation that this room would seem to encourage; a pair of candlesticks. Accessories are also seen in the form of lamps, both freestanding models and wall lamps, designed organically to fit in with the general conception of this linear-dominated space.  Finally, there are four area rugs in the room, of Caucasian origin and 4 Japanese prints, adorning the three walls of the room.
Significance:
Wright lived from 1867 to 1959.  But the Museum’s rescue of the Little living room allows his work to live forever, demonstrating his evolution as a artist and becoming, in the words of Berry B. Tracy, the Museum’s Curator in Charge, a “remarkable document of Wright as the total interior architect” (20).

BIBLIOGRAPHY:

Einbinder, Harvey: An American Genius:  Frank Lloyd Wright.  Philosophical Library, New York, 1986.

Hechscher, Morrison H:  “Outstanding Recent Accessions, 19th-Century Architecture for The American Wing:  Sullivan and Wright”.  M.M.A. Bulletin, June/July 1972, vol.XXX, No. 6, n.p.

Howard, Kathleen:  The Metropolitan Museum of Art Guide, 2nd Edition, Metropolitan Museum of Art, New York, 1994.

Lucie-Smith, Edward:  The Thames and Hudson Dictionary of Art Terms.  Thames and Hudson, New York, 1984,  21-22.

Plaque to be found in the Frank Lloyd Wright Living Room on the first floor in The American Wing in the Metropolitan Museum of Art, New York (referred to, in the essay, as ‘plaque’).

Starosciak, Kenneth:  Frank Lloyd Wright:  A Bibliography.  New Brighton, Minnesota, 1973.

Tracy, Berry B:  “American Wing”. M.M.A. Notable Acquisitions 1965-1975, 20.


Tour B

Highlights Tour B

Tour Route Photos: Chris Harris and by courtesy of the Metropolitan Museum of Art, New York.


The Great Hall

Introduction

 Greek Kouros

Dogon Couple from Mali, Africa

 The Bacchanal by Gian Lorenzo Bernini

Portrait of Gertrude Stein by Pablo Picasso

The Petrie Courtyard

 The Burgundian Madonna by Claus de Werve

The Frank Lloyd Wright Room

The Panorama of Versailles by John Van der Lyn

The Temple of Dendur

The Water Stone by Isamu Noguchi

Gibbons in a Landscape

Shiva as Nataraja

The Fortune Tellers by Georges de la Tour

A Mardi Gras Fiesta

MardiGras_Feb2005_Image001

 (Members of Our Gourmet Dinner Club nursing mai-tais during the Cocktail Hour of our Mardi Gras Dinner.

From left–Dan deLannoy, Brett Factora, Bonnie Britz-Thurnauer, Mary-Lauren Factora, Llew Almeida, Art Thurnauer and

(crouching in front) Amy deLannoy).

DINNER CLUB
Hosted by Amy and Dan de Lannoy
Dear Friends:

As you know, our first gathering for 2005 will be held at our home.  We will be celebrating Mardi Gras in style – costumes are not necessary, but a celebratory mood is a must!!

DINNER CLUB MENU

A MARDI GRAS CELEBRATION
Hosted by Amy and Dan de Lannoy
February 19, 2005


Starter

Singing Shrimp
Bonnie and Art
Salad
Romaine Salad with Creamy Garlic Dressing
And Roasted Garlic Croutons
Bonnie and Art
Soup

Gumbo Ya Ya
Brett and Mary Lauren
Main Course

Barbecued Quail with Andouille Bread Pudding
Amy and Dan
Dessert

Ginger and Vanilla Bean Crème Brulee
Rochelle and Llew

(Bonnie flambes her Singing Shrimp with Brandy–below left–seen plated in the picture on the right)

Image007

SINGING SHRIMP
Ingredients
10 frozen puff pastry shells
3 Tbsp. olive oil
¾ lb. small shitake mushrooms, stems removed and wiped clean (cut into quarters if large)
¾ tsp. salt
¾ tsp. freshly-ground black pepper
1¼ lb. medium shrimp, peeled and deveined
¾ c. green onions (green and white parts)
1½ Tbsp. minced shallots
½ Tbsp. minced garlic
¾ c. Cognac or other brandy
1 c. plus 3 Tbsp. heavy cream
1½ Tbsp. Dijon mustard
1½ Tbsp. minced fresh flat-leaf parsley
Preparation

Preheat oven to 400°F. Place the pastry shells on a baking sheet and bake according to directions on package until golden brown.  Remove tops from each pastry.  Let the pastry shells cool.

Heat the olive oil in a large skillet over medium-high heat.  Add the mushrooms, salt and pepper.  Saute until the mushrooms soften, about 4 minutes.  Add the shrimp, green onions, shallots and garlic and stir-fry for 1 minute.

Remove the pan from the heat and carefully add the Cognac.  Have a large lid nearby.  Return the pan to the heat, and very carefully ignite the brandy.  Once the flames go out (you may need to cover with the lid to extinguish if the flames leap too dramatically), add the cream, mustard and parsley and stir well.  Reduce the heat to medium-low and simmer for 2 minutes.
To serve, place a pastry shell on each of six plates.  Spoon the shrimp mixture into each shell.  Serve immediately.
Serves 10.
Emeril Prime Time!  by Emiril Lagasse

[Bonnie:  Please bake the pastry shells at home and bring to my house.   Please chop the rest of the items at home and transport them to my house, where you will finish the dish.  I think it will be spectacular to watch you prepare this dish!]

ROMAINE SALAD WITH CREAMY GARLIC DRESSING AND ROASTED GARLIC CROUTONS

Ingredients:
Croutons:
Two small loaves French bread, cut crosswise into ½ inch thick slices
½ cup olive oil
½ tsp salt
¼ tsp. freshly ground pepper
½ cup roasted garlic puree (recipe follows)

Creamy Garlic Dressing (makes 1 cup):
½ cup mayonnaise
¼ cup roasted garlic puree (recipe follows)
3 tbsps. freshly grated parmigiano-reggiano
2 tbsps heavy cream
1tbsps. fresh lemon juice
¼ tsp. Salt
¼ tsp. freshly ground pepper

Salad:
2 heads romaine lettuce, separated into leaves, rinsed and patted dry.

Preparation:
To make the croutons, pre-heat oven to 400 degrees F. Arrange the slices on bread of a baking sheet. Brush one side of each with olive oil and sprinkle with salt and pepper.  Bake until golden brown, about 15 minutes. Remove from the oven and let cool a bit. Spread the croutons with the roasted garlic puree.

To make the dressing, mix the mayonnaise, garlic puree, cheese, heavy cream, and lemon juice in a medium bowl with a rubber spatula. Season with salt and pepper. (Note: The dressing can be prepared up to 24 hours in advance).

Prepare the lettuce by tearing it into bite-size pieces.  Toss in a large bowl with the desired amount of dressing. Divide the greens among 8 salad plates and serve with 2-3 croutons on the side of each plate.

Serves 8.

Roasted Garlic Puree:
Ingredients:

10 heads garlic, about 1 ½ lbs.
¼ cup extra virgin olive oil
½ tsp. salt
¼ tsp. freshly ground black pepper

Prepartion:

Preheat the oven to 325 degrees F. Line a baking sheet with parchment or aluminium foil.

Cut the top quarter of each head of garlic so the cloves are exposed. Place cut side up on a baking sheet. Drizzle with oil and season with salt and pepper. Turn the garlic cut side down. Roast until the cloves are soft and golden brown, 1 to 1 1/4 hours.

Let the garlic cool. Squeeze the soft garlic flesh from each head into a bowl. Mash the flesh with a fork to blend it into a puree. (Note: The puree can be stored in an airtight container in the refrigerator for up to 2 weeks).

Makes about 1 cup.

From Emeril Prime Time by Emeril Lagasse
GUMBO YA YA

Ingredients

2 cups (4 sticks) unsalted butter
3 cups all-purpose flour
2 red bell peppers, diced
2 green bell peppers, diced
2 medium yellow onions, diced
2 stalks celery, diced
5 quarts chicken stock, heated (see attached recipe or use purchased chicken stock or a combination of prepared and purchased stock)
2 tablespoons Creole Seasoning
1 teaspoon ground black pepper
1 teaspoon crushed red pepper
1 teaspoon chili powder
1 teaspoon thyme
1 tablespoon chopped garlic
2 bay leaves
2 tablespoons kosher salt
1 pound andouille sausage, sliced 1/2-inch thick
1 whole 4-pound chicken, roasted and deboned, cut into 2-inch pieces (store-bought roasted chicken will work just fine)

Preparation

1. First you make a roux. Melt the butter in a 12-quart stockpot. Whisk in the flour and cook over medium-high heat until foaming. Cook, stirring often, until dark mahogany, about 1 hour [Note:  Some reviewers of this recipe indicated that it took longer to get the roux to a dark mahogany color.].
2. Add the peppers, onion, and celery. Cook until soft, about 5 minutes. Whisk in the chicken stock (make sure it’s hot), and bring the mixture to a boil. Reduce the heat to simmer. Stir in Creole Seasoning, black pepper, crushed red pepper, chili powder, thyme, chopped garlic, bay leaves, and kosher salt. Cook, skimming fat and excess flour from the top, as necessary, an additional 45 minutes.  [Note: Reviewers of this recipe noted that it is critical to skim the excess flour “scum” from the top to avoid an overly floury taste, and that it was important to do this before you stir the broth so that you don’t mix in the flour.]
3. Add the andouille sausage and chicken and cook for approximately 15 minutes.  Taste, adjust for seasoning and serve.

Makes 6 quarts.
Modified (based on comments of reviewers) from Epicurious (February 2000)

Chicken Stock (Yields 2 ½ Quarts)

Ingredients

1 chicken carcass
4 cups onions, diced
2 cups celery, diced
2 cups carrots, diced
2 bay leaves
1 garlic clove
1 tablespoon peppercorns
2 ¼ quarts cold water
¼ cup oil

Preparation

In a gallon pot over high heat, saute onion, celery and carrots in oil until browned.  Add remaining ingredients.  Allow to come to a boil; then reduce to a simmer and simmer for about 6 hours.  As stock is simmering, a foam will rise to the top.  This foam should be removed with a spoon.  Once stock has finished cooking, strain the stock through a mesh strainer over another pot and reserve liquid for use in recipe.


BARBECUED QUAIL WITH ANDOUILLE BREAD PUDDING
Makes 8 servings

Ingredients:
12 quail, split down the back and breast bones removed (about 3 ½ ounces each)
1 tbsp. Emeril’s Original Essence or Creole Seasoning
1 tsp. Salt
2 tbsps vegetable oil or as needed
2 cups barbecue sauce
Andouille Bread Pudding (recipe follows)

Preheat the oven to 375 degrees F.

Sesason the quail on both sides with the essence and salt.

Heat the oil in large heavy skillet over medium-high heat. Add 4 quail, breast-side down, and cook until browned, about 2 minutes. Arrange the quail breast-side up in a baking dish just large enough to hold them all. Add more oil to the skillet as needed and sear the remaining quail in two batches.

Spoon the barbecue sauce over the quail and bake until the meat looks rosy when pierced at a thigh bone, 12 to 15 minutes.

Serve immediately with the bread pudding.

ANDOUILLE BREAD PUDDING

Ingredients:
1 tbsp unsalted butter
2 tbsps vegetable oil
1 lb. Andouille sausage, chopped
2 cups chopped yellow onions
½ cup chopped celery
½ tsp salt
¼ tsp freshly ground black pepper
2 tbsps. chopped garlic
5 large eggs
1 cup heavy cream
3 cups milk
6 ounces white cheddar cheese
1 tbsp. Finely chopped green onion (green part only)
8 cups one-inch cubes white bread

Preheat the oven to 375 degrees F. Grease a 2-quart rectangular baking dish with the butter.

Heat the oil in large heavy skillet over medium heat. Add the sausage and cook, stirring for 3 minutes. Add the onions, celery, salt, and black pepper. Cook, stirring, until the vegetables are soft, 2 to 3 minutes.

Combine the eggs, cream and milk in a large mixing bowl and whisk to blend well. Fold in the sausage mixture, cheese and green onions. Add the bread cubes, pushing them into the sausage mixture.

Pour into the prepared baking dish. Bake until the top is golden brown, about 45 minutes.

Remove from the oven and let rest for 5 minutes before serving.

(Amy with her Creme Brulee in individual ramekins–below left)

Image017

GINGER AND VANILLA BEAN CREME BRULEE
Simply omit the ginger for a classic crème brûlée.
A small blowtorch (made for the kitchen) is a useful gadget for caramelizing the sugar topping. You can also broil the custards until the sugar turns dark brown.

Ingredients
For Custard
2 cups whipping cream
1/2 cup sugar
2 tablespoons chopped peeled fresh ginger
1 vanilla bean, split lengthwise
5 large egg yolks
For Crème Brûlée
12 teaspoons sugar
Sliced tropical fruit (such as mango, papaya and/or kiwi)

Make custard:
Preheat oven to 325°F. Place three 4-inch-diameter fluted flan dishes* in each of two 13 x 9 x 2-inch baking pans or place six 3/4-cup ramekins in 1 pan. Mix cream, sugar and ginger in heavy medium saucepan. Using small sharp knife, scrape seeds from vanilla bean. Add seeds and bean to saucepan. Stir over medium heat until sugar dissolves and mixture comes to simmer. Cover pan, reduce heat to very low and simmer gently 10 minutes to infuse flavors. Strain into large measuring cup.
Whisk yolks in medium bowl until well blended. Gradually whisk in hot cream mixture just to blend. Return custard to measuring cup; divide among dishes. Pour enough hot water into pans to come halfway up sides of dishes. Carefully transfer pans to oven.
Bake custards until almost set in center when pans are gently shaken, about 30 minutes for fluted flan dishes and 35 minutes for ramekins. Using metal spatula, transfer custards in dishes to work surface; cool 30 minutes. Chill at least 3 hours and up to 2 days.
Make Crème Brûlée:
Sprinkle 2 teaspoons sugar evenly over each custard. Working with 1 custard at a time, hold blowtorch** so that flame is 2 inches above surface. Direct flame so that sugar melts and browns, about 2 minutes.
Refrigerate until custards are firm again but topping is still brittle, at least 2 hours but no longer than 4 hours so that topping doesn’t soften. Garnish crème brûlées with fruit.
*Four-inch-diameter fluted clear glass flan dishes are available at cookware stores and many hardware stores. They are about 2/3 inch deep and hold about 1/2 cup liquid.
**Available at some cookware stores.

Serves 6.
Bon Appétit
February 1999
Cooking Class

Amy and Dan deLannoy who hosted our Mardi Gras Dinner at their festively decorated table.


Bon Voyage!


The World I've Visited

 (The red portions of this map show all the parts of the world that I have visited. To create a similar map for yourself, click on the link below and follow the prompts.)

Countries Visited Map

Where on earth would you like to go?

Would you like to stand on the edge of the Grand Canyon? Or would you prefer to watch a Shakespearean play performed in his birthplace on the Banks of River Avon? How do you feel about roaming through the exotic Grand Palaces of Thailand or bargaining for handicrafts in the mystic medinas of Morocco?

If the idea of packing your bags at short notice to explore the furthest reaches of our planet excites you, then come with me. We’re kindred spirits on a similar quest–to uncover the mysteries of our Earth and to become one with the diversity of her spirit.

The thirst for exploration has kept me constantly fascinated, perpetually awed and eternally eager to learn. Let me share with you some of my own close observations and interesting experiences of the world as it has revealed itself to me over the years in its endless guises.

Take your pick of the offerings below. Then, after you have become my traveling companion on this journey of discovery, share with me the accounts of your own travels. We do not need to pack up our passports to be armchair travelers. All we need is to take flight on the wings of our imaginations. If you are willing, we can travel together into exciting realms that are virginal and just waiting to be discovered.

Bon Voyage!

This entry was posted on January 1, 2005, in Bon Voyage!.

Backyard Dinner for Dads

Hosted by Amy and Dan de Lannoy

Dear Friends:

After much finagling, we managed to find a date that works for all of us!  Alleluia!  And, in celebration of Father’s Day and the birthdays of our fabulous hubbies (three of whom have birthdays within a few weeks (or days!) of the dinner), we will be having a backyard barbecue comprised of some of our male counterparts’ favorite foods – pesto bread sticks (for Dan), barbecued ribs (for Llew and Art), mashed potatoes (for Bret and Dan) and pie ala mode (for Dan and Art)!  Thanks to Bonnie for inspiring the theme!

As always, Dan will be supplying some fabulous wines, as well as an assortment of ales.
DINNER CLUB MENU

Starter

Grilled Pesto Breadsticks with Goat Cheese Pesto Spread
Rochelle and Llew
Main Course

Chili-Rubbed Baby Back Ribs with Espresso Barbecue Sauce
Amy and Dan

Grilled Tomatoes with Yogurt
Rochelle and Llew

Overnight Coleslaw with Mustard Seed
Mary Lauren and Bret

Garlic and Olive Oil Mashed Potatoes
Mary Lauren and Bret

Dessert

Raspberry and Blueberry Pie
Bonnie and Art

GRILLED PESTO BREADSTICKS WITH GOAT CHEESE-PESTO SPREAD

11 ounces soft fresh goat cheese (such as Montrachet), room temperature
14-ounce pesto (2 containers prepared pesto or 1 recipe of homemade pesto*)
1 1-pound French bread baguette, cut into 6-inch lengths
1/4 cup olive oil

Purée goat cheese in processor.  Mix in 7 ounces pesto. Transfer to medium bowl.(Can be made 1 day ahead. Cover; chill. Bring to room temperature before serving)
Prepare barbeque (medium-high heat). Halve each bread piece lengthwise, then cut each half lengthwise into 1 1/4-inch-wide strips. Combine 7 ounces pesto and oil in small bowl. Brush bread with pesto mixture. Grill until brown, about 45 seconds per side. Serve with cheese spread.

Makes 10 to 12 servings.
Bon Appétit
August 1996
*HOMEMADE PESTO

5 large garlic cloves
¾ cup pine nuts
3 oz Parmigiano-Reggiano, coarsely grated (1 cup)
1 ½ teaspoon salt
¾ teaspoon black pepper
4 ½ cups loosely packed fresh basil
1 cup extra-virgin olive oil

With food processor running, drop in garlic and finely chop. Stop motor and add nuts, cheese, salt, pepper, and basil, then process until finely chopped. With motor running, add oil, blending until incorporated.  Makes about 2 cups.
Cooks’ notes:
You can buy prepared pesto at the grocery store or make it yourself.  If you prepare it yourself, you can make it up to a week in advance, and keep it chilled in the refrigerator with its surface covered with plastic wrap.  We would suggest that you cut the breadsticks and prepare the pesto/goat cheese spread in advance, and come a little early (around 7:15) to grill the breadsticks at our house.

OVERNIGHT COLESLAW WITH MUSTARD SEED
This coleslaw should be made the day before you plan to serve it.

1 head green cabbage, cored and thinly sliced*
2 carrots, peeled and grated*
1 medium white onion, diced
¾ cup canola oil
½ cup honey
1 cup white wine vinegar
2 tablespoon mustard seeds
1 tablespoon salt
1/2 teaspoon freshly ground black pepper

In a large nonreactive bowl, combine the cabbage, carrots and onion.

In a nonreactive saucepan over medium heat, mix the oil, honey, vinegar, lemon juice, mustard seeds, salt and pepper.  Bring to a boil, stirring often.  Take the dressing off the heat; immediately pour it over the vegetables.  Toss well, cover and refrigerate for at least 6 hours (overnight is best) before serving.

Makes 8-10 servings.
Fine Cooking
June/July 1996

Cooks’ Note:  The cabbage and the carrot can be chopped very quickly and efficiently in a food processor.  We suggest cutting the cabbage into wedges that fit the chute, and then using the slicing blade.  We use the grating blade for the carrot.

CHILI-RUBBED BABY BACK RIBS WITH ESPRESSO BARBECUE SAUCE
2 tablespoons hot Mexican-style chili powder
1 tablespoon paprika
1 tablespoon ground cumin
1 1/2 teaspoons salt
3/4 teaspoon ground black pepper
4 pounds baby back pork ribs
1 12-ounce bottle dark beer
1 18-ounce bottle good-quality barbecue sauce
1/2 cup water
2 tablespoons (packed) golden brown sugar
1 tablespoon instant espresso powder

Preheat oven to 400°F. Whisk chili powder, paprika, cumin, salt, and pepper in small bowl to blend. Rub spice mixture all over ribs. Place ribs in heavy large roasting pan.
Boil beer in medium saucepan until reduced to 1 cup, about 5 minutes. Pour beer around ribs. Cover pan tightly with foil. Bake ribs until fork-tender, about 1 hour 30 minutes.
Combine barbecue sauce, 1/2 cup water, brown sugar, and espresso powder in heavy medium saucepan. Simmer until flavors blend and sauce thickens slightly, stirring occasionally, about 10 minutes. (Ribs and barbecue sauce can be prepared 1 day ahead. Cool slightly, then cover separately and refrigerate.)
Prepare barbecue (medium heat). Brush ribs with some barbecue sauce. Grill ribs just until heated through, about 3 minutes per side. Transfer ribs to platter. Bring remaining sauce to simmer. Brush ribs with more barbecue sauce. Serve ribs, passing remaining barbecue sauce separately.

Makes 4 to 6 servings.
Bon Appétit
R.S.V.P.
June 2003
Lovell’s of Lake Forest, Lake Forest, IL

GARLIC AND OLIVE OIL MASHED POTATOES

As this dish is denser and more intensely flavored than traditional mashed potatoes, our suggested serving size is smaller than you might expect. These potatoes make a fine accompaniment to simply seasoned grilled meats, fish, and poultry.Serves 8
INGREDIENTS3 pounds russet potatoes, unpeeled and scrubbed
8 medium cloves garlic, peeled
3 teaspoons kosher salt plus 1/4 additional teaspoon
¾ cup extra virgin olive oil plus 3 additional tablespoons
¾ teaspoon ground black pepper
3 teaspoons fresh lemon juice from 1 lemon

PREPARATION

1. Place potatoes in large saucepan with water to cover by 1 inch. Bring to boil over high heat; reduce heat to medium-low and cook at bare simmer until just tender (potatoes will offer very little resistance when poked with paring knife), 40 to 45 minutes. 2. While potatoes are simmering, mince 2 garlic cloves (or press through garlic press). Place minced garlic on cutting board and sprinkle with 1/4 teaspoon kosher salt. Using flat side of chef’s knife, drag garlic and salt back and forth across cutting board in small circular motions until garlic is ground into smooth paste. (A mortar and pestle could also be used for this.) Transfer to medium bowl and set aside.3. Mince remaining 6 cloves garlic (or press through garlic press). Place in small saucepan with 1/2 cup olive oil and cook over low heat, stirring constantly, until garlic foams and is soft, fragrant, and golden, 5 minutes. Transfer oil and garlic to bowl with raw garlic paste.4. Drain cooked potatoes; set food mill or ricer over now-empty saucepan. Using paring knife, peel skins from potatoes. Working in batches, cut peeled potatoes into large chunks and process through food mill or ricer into saucepan.5. Add remaining salt, pepper, lemon juice, and remaining uncooked olive oil to bowl with garlic and cooked oil and whisk to combine. Fold mixture into potatoes and serve.Cooks’ Note:  There is no easy way to prepare mashed potatoes in advance.  You can certainly prep all ingredients the night before (e.g., wash the whole potatoes, peel and mince the garlic and squeeze the lemon juice).  You can also probably  mash the 2 garlic cloves with the salt (step 1) and mix together the salt, pepper, lemon juice and remaining olive oil (approx 7 tablespoons) (step 5) in advance.  You should bring all of these ingredients in separate containers to our house to finish the prep.  We will make sure we have a big pot of water ready for the potatoes when you arrive.


GRILLED TOMATOES WITH YOGURT

Serves 8
Thick, creamy Greek or Middle Eastern yogurt, available at specialty-food stores, is especially good with these tomatoes, but plain full-fat yogurt will also work.

8   ripe, red tomatoes(about 1 3/4 pounds)

2   teaspoon dried oregano

2   teaspoon dried thyme

2   teaspoon fresh lemon juice

2   teaspoon extra-virgin olive oil, plus more for grill

Salt and freshly ground black pepper

1   cup plain yogurt, preferably Greek or Middle Eastern

Preparation1.   Cut 1/2 inch off top of tomatoes. Sprinkle cut end of tomatoes with oregano, thyme, lemon juice, oil, salt, and pepper.

2.   Brush a grill or grill pan with oil. Heat to hot. Place tomatoes on the grill, cut side down. Grill until slightly charred, 3 to 5 minutes. Turn and grill until soft and warm throughout, 3 to 5 minutes more. Transfer to a dish, and serve with yogurt on the side.

Cooks’ Notes:  The tomatoes can be cut and the other ingredients mixed together just prior to coming to our house.  The tomatoes can be drizzled with the oil/lemon juice/seasoning mix at our house and grilled on our frill just prior to the ribs.

RASPBERRY-BLUEBERRY PIE

Ingredients:
2 1/2 cups all purpose flour
Pinch of salt
½ cup (1 stick) chilled unsalted butter, cut into ½ inch cubes
6 tbsps. chilled solid vegetable shortening, cut into ½ inch cubes
¼ cup sour cream
3 tbsps iced water

Filling:
Nonstick vegetable oil spray
3 cups fresh raspberries (about 12 ounces)
2 ½ cups fresh blueberries (about 12 ounces)
1 cup sugar
1/3 cup tapioca, ground to a powder in a grinder /or cornstarch
¼ cup crème de cassis (blackcurrant flavored liqueur)

1 large egg
2 tbsps milk
3 tbsps raw sugar (aka turbinado or demerara sugar)

Vanilla and Chocolate ice-cream

Whisk flour and salt in large bowl. Add butter and shortening and rub in with fingertips until pea-size pieces form. Add sour cream and 3 tbsps ice water. Stir just until dough comes together.  Gather dough into ball and divide into 2 pieces. Flatten each into disk. Wrap dough in plastic wrap and refrigerate 2 hours.

Preheat oven to 375 degrees F. Spray 9 inch diameter glass pie dish with nonstick spray. Roll out one dough disk on to lightly floured surface 12-13 inch round. Line prepared pie dish with dough. Roll out remaining disk on lightly floured surface to 12-13 inch round.

Mix raspberries, blueberries, 1 cup sugar, tapioca and crème de cassis in large bowl. Spoon berry mixture into crust-lined pie dish. Top with second crust, trimming excess dough. Crimp edges together. Cut ¾ inch hole in center of top crust.

Whisk egg and milk in small bowl to blend. Brush some of mixture over crust. Sprinkle with raw sugar. Bake pie 15 minutes; reduce heat to 350 degrees F. Continue baking until crust browns and juices bubble thickly (cover crust with foil after 30 minutes to prevent overbrowning) about 1 hour.

Cool about 2 hours. (Pie can be made 6 hours ahead. Let stand at room temperature). Cut pie into wedges and serve warm or at room temperature with ice-cream.

A Night in Morocco

Hosted by Amy and Dan de Lannoy

GourmetClubDinnerFebruary2007023

(Gourmet Club Members enjoy A Night in Morocco)

Dear Friends:

Dan and I are so happy to be kicking off our fourth happy year together with “A Night in Morocco”.   As always, festivities start promptly at 7:30 and you can expect Dan to provide a fine wine selection to go with our meal.

This menu was a tricky one!  We found that Moroccan food is fairly labor-intensive and requires lots of different spices and other ingredients.  Although we tried to keep it simple, we also wanted to create an authentic meal.   Even though some of the recipes may look daunting at first glance, we think that you will find that they are actually easier than they sound!  (If not, please forgive us!)

Please note that every recipe may be made (at least in part) in advance.  Some parts of the recipes (e.g., the figs for the cake) MUST be made in advance.

DINNER CLUB MENU

A NIGHT IN MOROCCO

Hosted by Amy and Dan de Lannoy
Starters

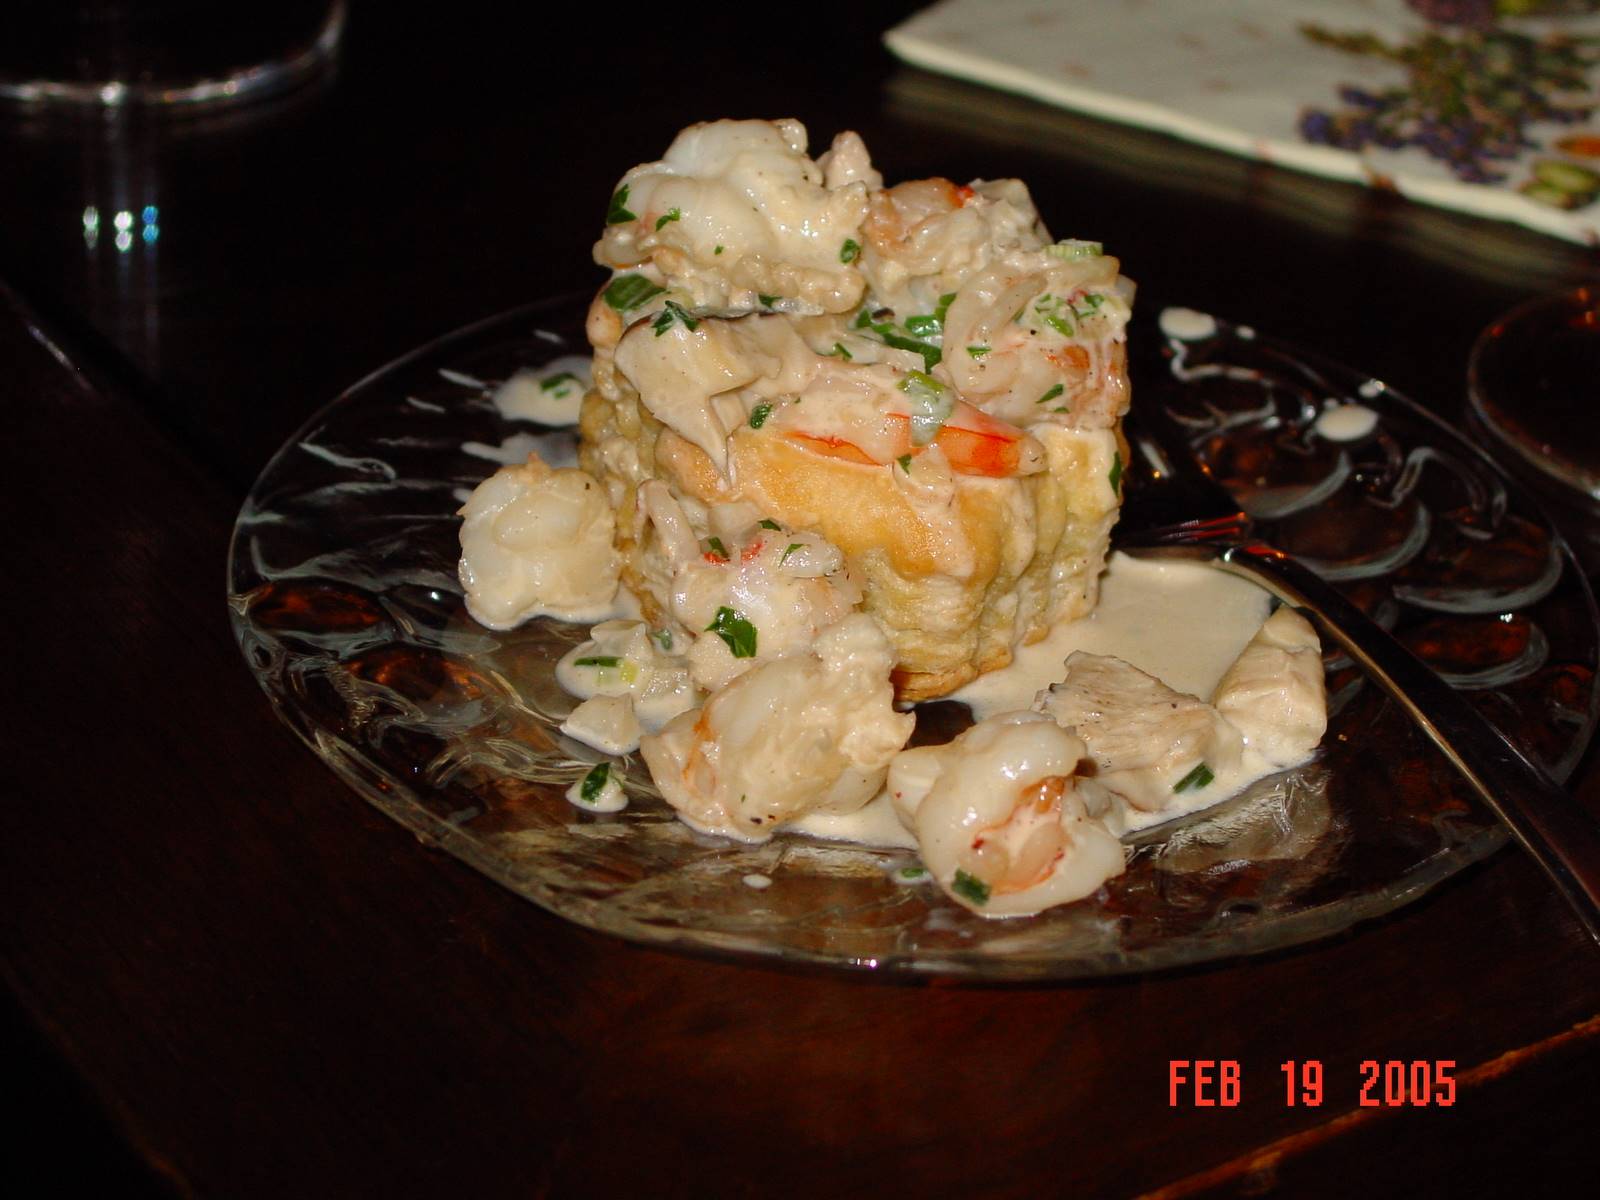
Individual B’Stillas (Moroccan Chicken and Almond Pies)
Mary Lauren and Bret

Roasted Red Pepper and Eggplant Dip  with Pita Chips
Mary Lauren and Bret

Salad

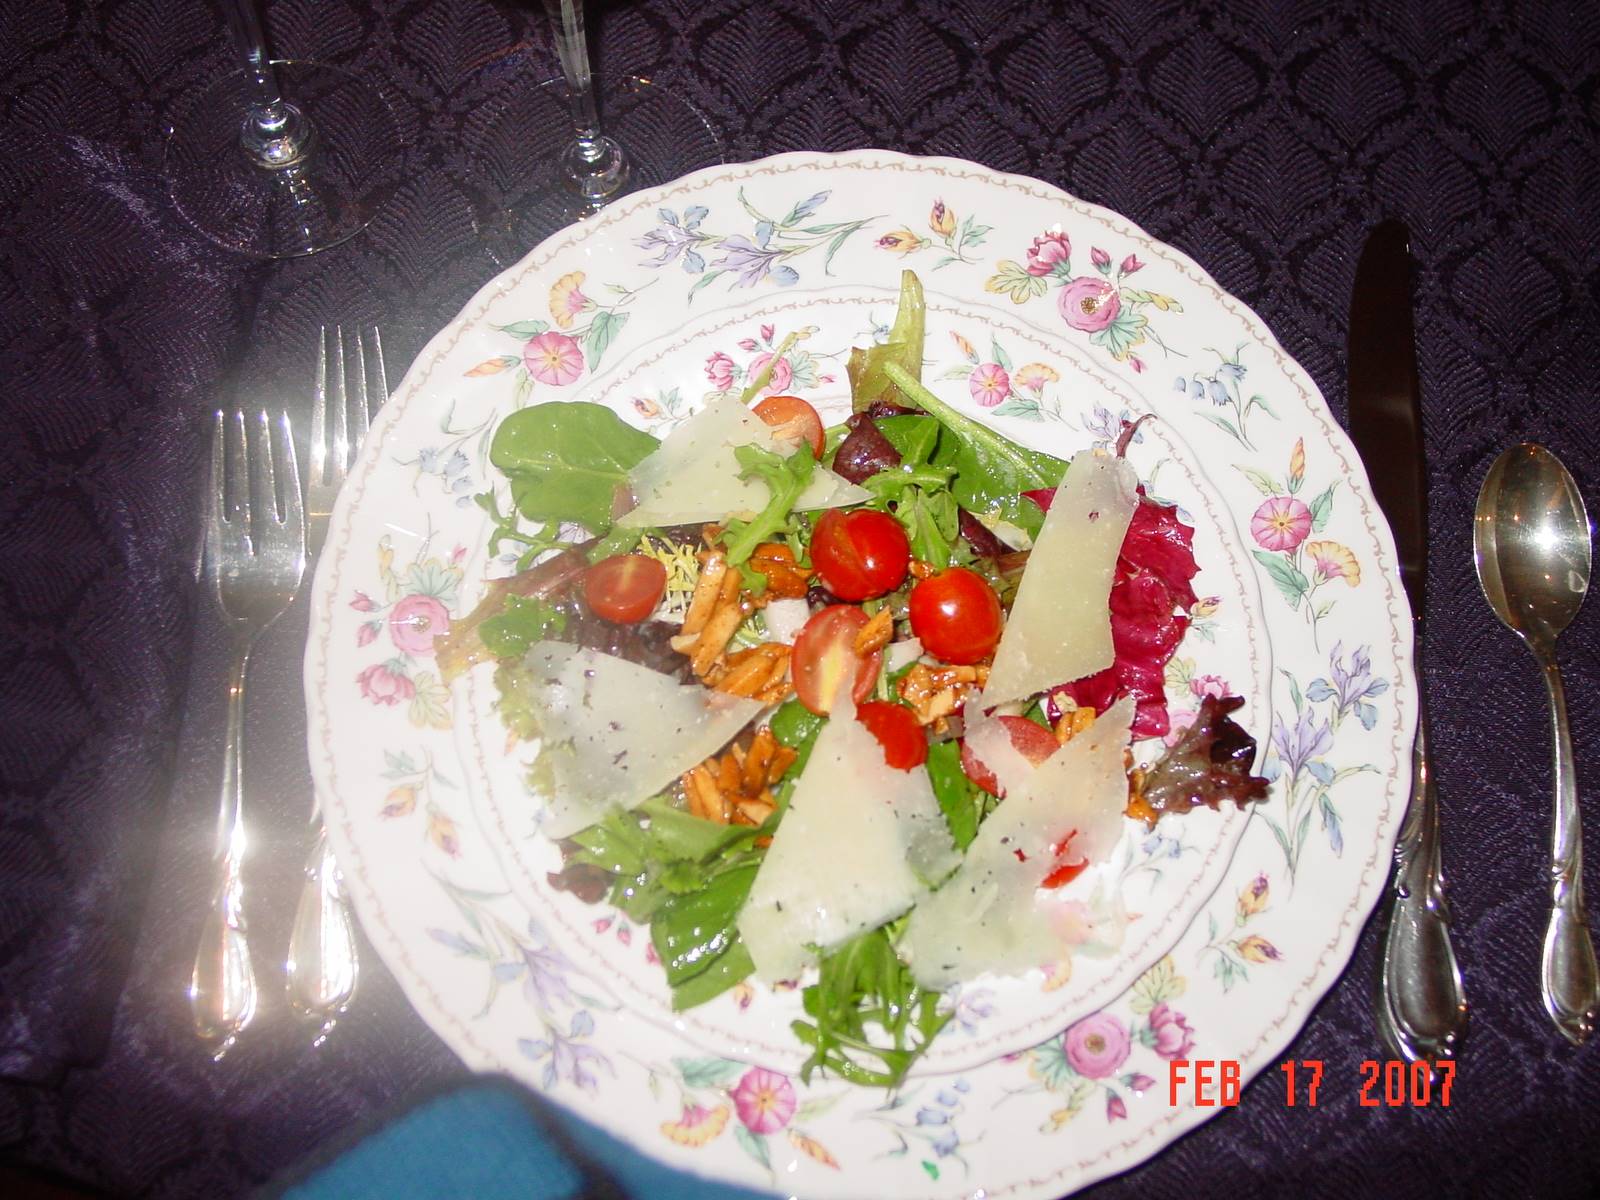
Arugula Salad with Honeyed Almonds
Bonnie and Art

Main Course

Lamb Tagine with Almonds,  Dates and Toasted Bulgar
Amy and Dan

Pan-Grilled Flatbread
Bonnie and Art

Dessert

Date-Spice Cake with Figs in Port Syrup and Vanilla Ice Cream
Rochelle and Llew

WINE SAMPLING FOR A NIGHT IN MOROCCO

RED

Las Rocas, Vinas Viejas de San Alejandro, Garnacha 2004

Tradicao, Palmela, 2002

Dao, Castas de Santar, 2002

Izadi, Tempranillo, Rioja, 2003

 WHITE

Quinta de Cabriz, DAO, 2005

Castelo de Medina, Verdejo, 2004

Fetzer, Savignon Blanc, 2004


GourmetClubDinnerFebruary2007021

ARUGULA SALAD WITH HONEYED ALMONDS
Note:  The honeyed almonds can be made up to 3 days in advance.  Toss salad just before serving.
Ingredients
1/3 cup sugar
3/4 teaspoon ground cinnamon
scant 1/2 teaspoon paprika
scant 1/4 teaspoon cayenne pepper
2 1/4 cup whole blanched almonds
6 tablespoons honey, divided
1/2 cup red wine vinegar
3/4 cup olive oil
3 tablespoons chopped shallots
9 cups mixed baby greens (about 4 1/2 oz)
7 cups arugula (about 5 oz)
2 small head Belgian endive, cut into matchstick-size strips
9 ounces thinly sliced manchego cheese, cut into triangles
16 ounces cherry tomatoes, halved
Preparation

Heat the oven to 350° F.  Brush rimmed baking sheet with oil.  Oil large sheet of foil; set aside.  Mix sugar, cinnamon, paprika and cayenne in medium bowl.  Add almonds and 2 1/2 tbsp. honey and toss to coat.  Spread out almonds on prepared baking sheet.  Bake until almonds are brown and glazed, stirring occasionally, about 14 minutes.  Turn almonds out onto oiled foil and cool, separating almonds with fork.  Note:  Honeyed almonds can be made 3 days ahead.  Cool completely and store in air-tight container.

Whisk remaining 3 ½ tbsp. honey and the vinegar in a small bowl.  Gradually whisk in olive oil and shallots.  Season vinaigrette to taste with salt and pepper.

Combine mixed baby greens, arugula and endive in large bowl.  Toss with enough vinaigrette to coat.  Mound salad on plates.  Arrange manchego triangles upright around salad.  Sprinkle almonds and tomatoes atop salads.
Makes 8 servings
Bon Appetit (September 2001)

INDIVIDUAL B’STILLAS
(MOROCCAN CHICKEN AND ALMOND PIES)
Note:  Almond sugar and filling may be made up to 1 day in advance and stored as specified below.  You may either bake the B’stillas immediately before you leave your home or bring them to our house to bake.  Please let us know if you choose the latter option and we will ensure that the oven is preheated prior to your arrival.  As noted below, we will provide the Ras el Hanout spice mixture.  Phyllo dough should be available at Stop & Shop.
Ingredients

For the almond sugar:
3/4 cup blanched whole almonds, toasted (in oven at 350° for 5-10 minutes) and cooled
4 tablespoons granulated sugar
1 1/2  teaspoon cinnamon
For the filling:
1/4 teaspoon saffron threads, crumbled
2 tablespoons hot water
1 medium onion, chopped (about 1 1/4  cups)
2 garlic cloves, cut into thin strips
1 ½ sticks (3/4  cup) unsalted butter, divided
3/4 teaspoon ground ginger
1/2 teaspoon freshly ground black pepper
2 pounds chicken parts (about 1 whole breast, 2 thighs, and 2 legs)
1 1/2 cups low-salt chicken broth
3 large eggs, beaten lightly in a small bowl
1/4 cup plus 2 tablespoons chopped fresh parsley leaves
3 tablespoons chopped fresh coriander
1 1/2 tablespoons fresh lemon juice, or to taste
18 sheets (about 1 1/2 packages) phyllo (preferably Number 4 ultra-thin)
confectioners’ sugar and cinnamon for sprinkling
2 teaspoons Ras el Hanout
Preparation

To make the almond sugar:
In a food processor, fine grind the almonds, granulated sugar, and cinnamon.  Almond sugar may be made 1 day ahead and kept covered in a cool dark place.
To make the filling:
In a small bowl, combine saffron with hot water and let stand 10 minutes.
In a heavy 4-quart pan, sauté onion and garlic in 3 tablespoons butter over medium high heat, stirring occasionally, until onion is golden, about 4 minutes. Reduce heat to medium and add ginger, ras el hanout, and pepper. Cook mixture, stirring, 3 minutes.
Add chicken parts, broth, and saffron mixture and simmer, covered, turning the chicken once, until chicken is very tender and cooked through, 25 to 35 minutes. Let chicken stand in cooking liquid off heat 30 minutes. Transfer chicken to a plate, reserving cooking liquid and solids, and, when cool enough to handle, shred chicken, discarding skin and bones.
Measure reserved cooking liquid and solids, return to 4 qt. pan (if necessary, boil the cooking liquid, stirring occasionally, until reduced to about 1 3/4 cups). Reduce heat to medium and whisk in eggs to cooking liquid in a stream, whisking.  Cook mixture, stirring, until eggs are set, about 3 minutes. Remove pan from heat and pour egg mixture into a coarse sieve set over a bowl. Let mixture drain undisturbed 10 minutes before discarding liquid. Transfer egg mixture to a bowl. Stir in chicken, parsley, coriander, lemon juice, and salt and pepper to taste and chill. Filling may be made 1 day ahead and kept chilled, covered.
Assembling the B’stillas:
Preheat oven to 425°F and butter 2 large shallow baking pans.
In a small saucepan, melt remaining 9 tablespoons butter and keep warm but not hot.
Cut phyllo sheets in half lengthwise and stack between 2 sheets wax paper. Cover wax paper sheets with a kitchen towel. On a work surface, arrange a half sheet of phyllo with short side facing you and brush with melted butter. On this, layer and brush 3 more half sheets of phyllo in the same manner.
Sprinkle 1 tablespoon almond sugar on short side of phyllo nearest you to cover about 2 1/2-by 4-inch area, leaving a 1-inch border on 3 edges. Put 1/3 cup chicken mixture over almond sugar and spread out slightly. Top chicken mixture with 1 more tablespoon almond sugar and roll up filling in phyllo, folding in sides after first roll. Transfer b’stilla immediately.
Form 8 more b’stillas in the same manner with remaining phyllo, butter, almond sugar, and chicken mixture, chilling each b’stilla as it is made. B’stillas may be prepared up to this point 4 hours ahead and kept chilled, covered lightly with plastic wrap once cold.
Bake chilled b’stillas in oven until tops and ends are puffed and browned, 15 to 20 minutes. Cool b’stillas slightly on a rack. Sprinkle b’stillas with confectioners’ sugar and cinnamon and serve warm.

Ras El Hanout (Moroccan Spice Blend)
Ingredients:
1/2 teaspoon aniseed
1 teaspoon fennel seeds
8 whole allspice berries
Seeds from 8 cardamom pods
8 whole cloves
15 whole black peppercorns
1 stick cinnamon, broken in half
1 tablespoon sesame seeds
1 teaspoon coriander seeds
1/2 teaspoon cumin seed
Pinch dried red pepper flakes
Pinch ground mace
1 tablespoon ground ginger
1 teaspoon freshly ground nutmeg
In a spice grinder or cleaned coffee grinder, grind fine aniseed, fennel seeds, allspice berries, cardamom seeds, cloves, peppercorns, cinnamon stick, sesame seeds, coriander seeds, cumin seed, and red pepper flakes.  Mix ground spice mixture with mace, ginger, and nutmeg .  Store in a tightly closed jar in a cool dark place for up to 6 months.  Makes about 1/4 cup.  **Amy will provide

Makes 9 b’stillas
Gourmet
August 1994
PAN-GRILLED FLATBREAD

Note:  Dough may be made entirely in food processor or by hand up to 2 days in advance and refrigerated.  Make sure you let the pieces of dough rest after forming them into balls and again after rolling them into 4-inch circles; otherwise, they will shrink back and not hold their shape.  Only one flatbread will fit in a skillet, so speed up the cooking process by using two skillets. Alternatively, you can bake the breads in an oven, as specified below.  Breads may be fully cooked up to 2 days in advance and reheated at our house (as described below) or completed on the day of the meal and cooked at our house.
1 package  dry active yeast (2 1/4 teaspoons)
1 cup warm water (110 to 115 degrees)
1 tablespoon olive oil , plus extra for brushing
2 teaspoons granulated sugar
1/4 cup plain yogurt
1 1/2 teaspoons table salt , plus extra for sprinkling
1/2 cup whole wheat flour , sieved (before measuring) to remove coarse flakes of bran
2 cups bread flour , plus additional as needed
2 tablespoons sesame seeds (optional)

Eastern  1. In either the workbowl of a food processor fitted with a stainless steel blade or, if working by hand, a medium mixing bowl, sprinkle yeast over warm water. Let stand for five minutes.  Add oil, sugar, and yogurt and pulse to mix, about four 1-second bursts, or, if working by hand, mix with wooden spoon until well combined. Add salt, sieved whole wheat flour, and 2 cups bread flour; process until smooth, about 15 seconds, scraping down sides of bowl as necessary, or, if working by hand, mix with wooden spoon until flour is incorporated, about 3 minutes. Process dough (adding more flour as necessary until dough just pulls completely away from sides of bowl) until soft and satiny, about 30 seconds, or, if working by hand, turn dough out of mixing bowl onto very lightly floured work surface and knead until smooth and elastic, 12 to 15 minutes. Squeeze dough gently with full hand; if dough is sticky, sprinkle with flour and knead just to combine. Place dough in medium bowl or straight-sided plastic container, cover with plastic wrap, and place in warm, draft-free spot until dough doubles in size, 30 to 45 minutes. (At this point, dough can be punched down, wrapped tightly in plastic wrap, and refrigerated up to 2 days.)2. Turn dough onto lightly floured work surface and, if it is sticky, sprinkle very lightly with flour. Use a chef’s knife to divide the dough into 8 equal portions.  Roll each portion of dough on work surface to form a round ball.  Let rest for 10 minutes.  Roll each ball out into a 4-inch circle and let rest for 10 minutes.  Then roll each into a 6 inch circle.  If using sesame seeds, brush tops of circles lightly with water, sprinkle each circle with 3/4 teaspoon seeds, and gently roll over with rolling pin once or twice so seeds adhere to dough.3. Five to 10 minutes before cooking flatbreads, heat large, heavy skillet (preferably cast iron) over medium-high heat until hot. Working one at a time, lift dough circles, gently stretch about one inch larger (so dough is a 7-inch circle), and place on the skillet.  Cook until small bubbles appear on surface of dough, about 30 seconds. With tongs, flip bread and cook until bottom is speckled and deep golden brown in spots, about 2 minutes. Flip bread over again; cook until bottom is speckled and deep golden brown in spots, 1 to 2 minutes longer.  (Alternatively, breads may be baked in oven.  About 30 minutes prior to cooking, adjust oven rack to lowest position, line rack with unglazed baking tiles, pizza stone, or preheated baking sheet and heat oven to 500 degrees. Bake dough rounds on preheated tiles or pizza stone until bread is puffed and golden brown on bottom, 5 to 6 minutes.) 4. Transfer bread to wire rack and cool for about 5 minutes (brush bread lightly with olive oil and sprinkle with salt to taste, if desired). Wrap breads loosely in clean kitchen towel and serve warm.  Or wrap breads tightly in foil and store at room temperature up to 2 days; reheat in 300-degree oven until warm, about 15 minutes.Makes eight 6- to 7-inch breads www.cooksillustrated.com


LAMB TAGINE WITH ALMONDS, DATES, AND TOASTED BULGAR
Note:  This dish may be served with couscous in place of the toasted bulgar.
Ingredients
1/4 cup olive oil
1 1/2 lbs. Boneless lamb shoulder, cut into ¾ inch cubes
1 large onion, halved and sliced
1 1/2 cups sliced carrots
3/4 cup minced shallots
3 cloves garlic, minced
one 1-inch piece fresh ginger, peeled and minced
1/2 tsp. saffron threads
1 tbsp. freshly ground toasted cumin seeds
1 tbsp. paprika
1 tbsp. ground cinnamon
1 tsp. ground cardamom
1/4 tsp. ground allspice
About 3 cups chicken stock
3/4 cup honey
1/4 to 1/2 cup sliced pitted dates
salt and freshly ground pepper to taste
cayenne pepper to taste
1/4 cup plus 2 tbsp. chopped fresh flat-leaf parsley
Toasted Bulgar (recipe follows)
1 cup chopped toasted almonds
Preparation

In a large Dutch oven, heat the oil over medium heat.  Add the lamb and sear for about 5 minutes or until well browned on all sides.  Transfer to paper towels to drain.

Add the onions, carrots, shallots, garlic and ginger to the Dutch oven and stir to combine.  Add the saffron, cumin, paprika, cinnamon, cardamom and allspice and cook, stirring occasionally, for about 10 minutes or until veggies soften.

Return the lamb to the Dutch oven, stir and add just enough stock to barley cover the lamb.  Reduce the heat, cover and simmer gently for about 1 hour or until the lamb is fork-tender and the liquid has reduced to a sauce-like consistency.  Do not allow to boil.

Stir in the honey and 1/4 cup dates.  Taste for sweetness and add up to ¼ cup more dates if desired.  Season with salt, pepper and cayenne.  Stir in 1/4 cup of the parsley.

Mound the bulgur in the center of the plates.  Spoon the tagine over the top and garnish with the almonds and the remaining parsley.  Serve immediately.
TOASTED BULGUR

Ingredients

1 1/2 cups coarse-ground bulgur
3 tablespoons olive oil
1 large onion, chopped
1/4 tsp. hot green chile (such as jalapeno or serrano), seeded and chopped
2 tsp. tomato pasted
1 3/4 cup plus 2 tbsp. boiling water
1 tbsp. plus 1 1/2 tsp. fresh lemon juice
1/4 cup chopped fresh flat-leaf parsley
Salt and freshly ground pepper to taste

Preparation:

Preheat the oven to 300°F.  Spread the bulgur on a baking sheet and toast in the oven, stirring frequently, for about 7 minutes or until light brown.  Do not let the bulgur get too dark.

In a large skillet, heat the oil over medium heat.  Add the onions and chile and sauté for about 4 minutes, or until the onions are soft and translucent.  Stir in the bulgur and tomato paste, add the water and bring to a boil.  Stir gently, reduce the heat, cover, and cook for about 20 minutes or until all of the water has been absorbed and the bulgur is tender.  (Note:  Bulgur can be prepared up to this point early in the day.  To reheat, moisten with about ¼ cup chicken stock and warm over low heat.)  Stir in the lemon juice, parsley and salt and pepper.  Remove from the heat, cover and let rest for 5 minutes before serving.

Makes 6 servings
Cooking with Great Cooks
ROASTED RED PEPPER AND EGGPLANT DIP
Note:  This dip may be made up to 2 days in advance.  Serve with store-bought pita chips.  I have an extra food processor if you do not have one.
Ingredients

1 large (1 1/4  lbs.) eggplant, cut in half lengthwise and pricked in 3 to 4 places with the point of a knife
1 large red bell peppers, halved, seeds and ribs removed
4 garlic cloves, peeled
2 tablespoons olive oil
1/4 cup pine nuts, lightly toasted (in the oven at 350° for about 5 minutes)
1 teaspoon whole cumin seed, toasted (in a skillet over medium–high heat until aromatic) and ground
1/4 teaspoon red pepper flakes
1/4 cup chopped fresh cilantro
2 tablespoons fresh lemon juice
1/4 cup roughly chopped fresh flat-leaf parsley, plus extra for garnish
Kosher salt and freshly ground pepper
Preparation

Heat the oven to 475° F.  Brush the eggplant, peppers and garlic with the oil.  Arrange them cut-side down on a baking sheet.  Cook until the eggplant softens, the skin on the peppers separates and the garlic is golden, 30 to 45 minutes.
Transfer the eggplant to a colander to drain.  Once cool enough to handle, remove the skins from the peppers.  Use a large spoon to remove the pulp from the eggplant.  Discard the skins.
Transfer the eggplant pulp, the peppers and garlic to the bowl of a food processor and pulse until combined.  Add the pine nuts, cumin, pepper flakes, cilantro, lemon juice and parsley.  Process until smooth.  Add salt and pepper to taste.
Garnish the dip with some chopped parsley and serve.  The dip can be refrigerated in an airtight container for up to 2 days.  Return to room temperature before serving.

Makes 3 cups
Martha Stewart Hors D’oeuvres Handbook
DATE-SPICE CAKE WITH FIGS IN PORT SYRUP
Note:  The figs should be prepped at least 1 day in advance.  The cake may be made one day in advance, as well, and wrapped and stored at room temperature.  Serve with store-bought, good quality (like Hagen Daz) vanilla ice cream.  As noted below, star anise may be hard to find.  Based on my research, ground, toasted aniseed may be substituted for the star anise.
Ingredients
Figs:
2 cups dry red wine
2 cups ruby port
1/3 cup sugar
1 whole star anise
1/4 teaspoon whole black peppercorns
20 dried black mission figs (about 6 oz), halved lengthwise
Cake:
1 cup thinly sliced pitted dates
2 cups flour
1 1/3 cups slivered almonds
1 teaspoon baking powder
1 teaspoon baking soda
1/2 teaspoon salt
1/2 teaspoon ground cinnamon
1/4 teaspoon ground cloves
1 cup (2 sticks) unsalted butter, room temperature
1 3/4 cups sugar
1 tablespoon grated orange peel
1 teaspoon grated lemon peel
6 large eggs
1 cup sour cream
1 ½ tablespoons Grand Marnier (or other orange liqueur)

Good Quality Vanilla Ice Cream (e.g., Hagen Daz)
Preparation

For Figs:  Bring wine, port, sugar, star anise and peppercorns to a simmer in a heavy medium saucepan, stirring until sugar dissolves.  Boil until reduced to 1 ½ cups, about 15 minutes. Strain into a medium bowl.  Mix in figs.  Cool, cover and let stand overnight at room temperatures.

For Cake:  Preheat the oven to 325° F.  Butter and flour a 13x9x2 inch metal baking pan.  Toss dates with 1/4 cup of flour in a small bowl to separate dried fruit pieces.  Mix in 1 c. almonds.  Set mixture aside.

Whisk remaining 1 3/4 cup flour, baking powder, baking soda, salt and spices in a medium bowl to blend.  Using electric mixture, beat butter in large bowl until light.  Add sugar, orange peel and lemon peel, and beat until well blended.  Add eggs 1 at a time, beating well after each addition.  Beat in sour cream and grand marnier, then dry ingredients.  Mix in date and almond mixture.  Transfer batter to prepared pan.

Bake cake until top is golden brown and tester inserted into the center of the cake comes out clean, about 50 minutes.  Cool cake completely in pan on rack.  Note:  Spice cake can be made up to 1 day in advance.  Cover and let stand at room temperature.

Cut cake into 12-14 diamond shape pieces.  Transfer to plates.  Place scoop of ice cream next to each cake piece.   Spoon figs with Port syrup over.

Makes 12 servings
Bon Appetit (September 2001)